Showing posts with label brewing. Show all posts

Tuesday, November 25, 2014

Moving up to All Grain

My friend Andy wrote:
I am just starting to investigate mashing so don't really know what is involved. ...  I was at a brew store today and they pointed at a large modified tank cooler that they were using for mashing. I guess I would be interested in what the proper equipment would be in doing my own mash and also if the gains over purchasing extracts are worth the additional investments in mashing equipment.

It wasn't that long ago that I was in the same situation as Andy, and I thought I would respond to this in a more permanent way, in hopes it will help others. 

Why change from extract to all-grain?

I made the change because of two things:
  1. All grain was cheaper per batch than extract (after you figure in the cost of some additional equipment).  The cost savings is because you are buying grain and extracting the sugars (mashing) yourself, rather than buying LME or DME. It costs me $10-20 for a 5 gallon batch of all malt beer (adding fruit or other adjuncts might add to the cost).  DME is close to double the cost, LME is a bit more, I think.
  2. Control over the process.  When you mash you can control whether you get more or fewer long chain sugars (controlled by mash temp).  That's really the main thing.  When you use extract you are at the receiving end of someone else's process, and they are  mashing at a specific temp (probably 152 deg F) which is sort of a typical medium bodied beer.  

In making the change I gave up a couple things, too:

  1. Time. On average it takes my 6 hours to brew a batch of beer using the all grain method, where it took 3 when doing straight extract, and maybe 3.5 hours doing a partial mash.  So one question to ask yourself is whether your time is more valuable.
  2. Space.  I now have about 3-4 times the equipment that I did when I did when I was doing extract.  Some of that is stuff I would have gotten do do extract anyway, but mash tun with a false bottom is not one of them, nor is a hot-liquor tank. It takes a lot more space to store that stuff!

So what's the proper equipment?

 Brew in a Bag

The latest "innovation" in home brewing came out of Australia, where it is very popular.  It is called "Brew In A Bag", and if I were starting all-grain again, this is what I would do. I use it now for small batches.  Basically, you use a single pot to mash and boil. You can do this by using a fine-mesh bag (http://www.brewinabag.com/) to hold line the pot and hold your grain during the mashing process, when the mash is over, you simply (but with great effort, if you are making a big batch) remove the bag with all your wet grain and let it drain back into the pot.
  With my 1.5 gallon batches on the stove, this is no big deal.  With a 5 gallon batch and 10 lbs of grain (dry weight), I would need a pulley, which I really can't install in my kitchen.  Why do it? Simplicity!   If you are brewing outside, or in a basement, you just need to have something over the brew pot that you can use to remove the bag.  Your equipment needs are small, and you get the same results as with any all-grain technique. However, you have to have a big enough pot to handle mashing with ALL the liquid you need to brew, and the extraction may be slightly less efficient than when you are fly sparging, so you need a little more grain (negligible cost, however).


3-vessel Setups

 The more traditional method is to use 3 vessels:
  1. Hot Liquor tank - holds your hot water for mashing and sparging (requires a heat source).  I have a 7.5 gallon aluminum turkey fryer pot that I put on top of my gas stove.  When I was doing extract, this was my boil kettle.
  2. Mash/Lauter tun - This holds your grain at mash temp (or temperatures, if you are step-mashing).  You can control mash temperatures in several ways,depending on your approach: direct heat, indirect heat (HERMS or RIMS, which circulate hot water from your hot liquor tank through a coil to heat the mash or circulate your mash water through a coil in the hot liquor tank to heat it), or infusions of hot water.  Yup, it is confusing!  I have a converted 10 gallon Rubbermaid cooler
    with a stainless false bottom, and use the infusion method.  This way I don't need heat.
  3. Boil kettle - this is where you boil your wort, simply enough.  It needs to be big enough to do a full boil, which means roughly 50% -75% larger than your batch size. I have a 9.5 gallon stainless pot that is about 17" in diameter and covers two burners on my stove.
Now, it is not sufficient just to get the 3 vessels, you also need a way to transfer the wort and hot liquor around.    I started with the gravity fed method, which was highly dangerous!   Because you have to get the hot liquor tank higher than everything else, you need to use milk crates or some sort of structure (there are lots of plans for this online) to create a stepped system, the lowest level of which is for the boil kettle and is high enough off the ground that you can just run off the boil kettle (which must be on a burner) into your fermenter.  Everything else goes up from there!  I was using a 7 gallon bottling bucket as my hot liquor tank, and had to climb on a stepladder with 7 gallons of hot water to put it up on its platform--talk about dangerous!

Better still is to use a pump! Not only does this save your back, but it will most likely keep you from getting scalded by falling 170 degree water!  Probably the best $100 I ever spent!  In the picture above, you can see the pump moving the wort from the mash/lauter tun to the brew pot, while the hot liquor tank gravity feeds sparge water into the mash/lauter tun.  This simplifies the process considerably because you can push liquids uphill.

Brewing Structures

Some folks use brewing structures, which seem to me to best fit outdoors, especially if you can keep them in a shed or garage.  These are permanently put together and often have burners and gas lines welded into them, along with pumps and control panels. The Brutus 10 (http://www.alenuts.com/alenuts/brutus.html)
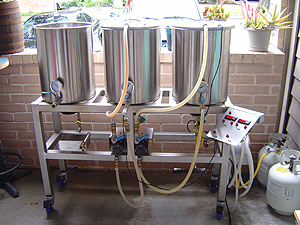
is an example of an "open source" plan for such things, and if you would rather buy one, there are commercial examples like the Ruby Street Brewery (http://www.rubystreetbrewing.com/tp60/page.asp?ID=318741) which comes in a variety of sizes, as well as others made by Blichmann and More Beer, which are all excellent and work well.  The biggest issue is that you need to have the space and good ventilation (hence garages, and outdoor brewing).  My ex-wife kicked me out of the house (for brewing) because she didn't like the smell of wort boiling, so I ended up on the deck with my turkey fryer burner and my gravity fed set up.  I aspired to something like Brutus, for sure!

Electric Brewing

The other option is to go electric!  My friend Mike has an electric brewery he made himself, and it is really fantastic!
We can brew in his basement,as you can see.  He has 2 pumps to circulate wort and transfer from place to place.  Best of all, on a cold winter day, you aren't out in the snow and ice, you can be warm in the basement with no worry about exhaust fumes.  You can buy or make (http://www.theelectricbrewery.com/) these systems, but if you are going to make your own, you need to be really comfortable working with high-voltage systems in wet conditions--not for me!   Next time I have a basement, I'm planning to buy the electric brewery equipment.

Conclusion

So, in the end, what do you need, Andy?  It really depends how you want to do your brewing, and how much you want to spend for your initial investment.  You can buy a lot of this stuff used on Craigslist as people either stop brewing or move up to some other system. Of course you can support your LHBS or buy online.  I bought most of my stuff at Austin Homebrewing or Northern Brewer. 

Sunday, April 14, 2013

Apricot Saison and the AHA Conference 2013

I'm getting ready for the AHA Conference in Philadelphia in June of this year.

Brewing Apricot Saison in collaboration with my friend and fellow BFD Mike Damiano, and Patriot Oatmeal Stout.   We brewed the Saison in a 15 gal batch on Mikes electric brewery, which was pretty freakin cool!  I have about 4.5 gals on apricot puree sitting in my apartment right now, while Mike has the remaining 10 gals.  So we have 5 for AHA and about 4 for each of us!  This is my first fruit beer (unless you count a pumpkin ale I made right after I started brewing).    Here's the info on how to add fruit:  http://www.homebrewjunkie.com/2008/05/adding-fruit-to-home-brew.html

After speaking to a couple folks who have done this recently, I think we may have been light on the Apricot, but we will see.

Today I am brewing the Oatmeal stout, and I have had the difficult experience of trying to do a double infusion in a 10 gal cooler.  I added another 2 gals of boiling water to the mash to get to Mashout temp (168 degrees F) and ended up with minor overflow.  This was one of the most difficult brew days I have had in some time, and it all started with the grain crush. I couldn't get it to crush properly, and I ended up with the grain still in the husk, even though I conditioned it and re-milled it.  I think there could have been two issues:
  1. I was using some Valley Malt 2 row that is now 2 years old, I think.  It is possible that it isn't good anymore.
  2. I was trying to mill the grain using a drill instead of hand cranking, as I usually do.  I wonder if I milled too fast and it just squirted through.
  3. (oh, yeah, I said two--well tough) I might not have sprayed sufficient water to condition the grain .
So from the start, my gravity was low.  Of course, I had a hard time telling that because for some reason my refractometer seems to be messed up.  The line you read is now on an angle, which is not so good.  Also, the plastic cover doesn't seem to line up properly.  I checked it with a hydrometer though, and it was accurate once I nudged it back to place and re-calibrated with some distilled water.  I was shooting for a relatively high OG for the style, but ended up with 1.054, which is in the guidelines, but not what I should have had given the grain bill--that would have been 1.069!  A major miss, that one!   Of course the calculation was with Thomas Fawcett Maris Otter, not Valley Malt 2-row, so it might not have hit exactly, but I expected to be closer.

One cool thing that I tried (anyone but a brewing geek can stop reading here) is to recirculate the boiling wort in the last 15 mins and after knockout to cycle it around the kettle and the immersion chiller. Got the fasted cool down I have ever had with that chiller, so I guess it works! Thanks, Jamil, for idea.


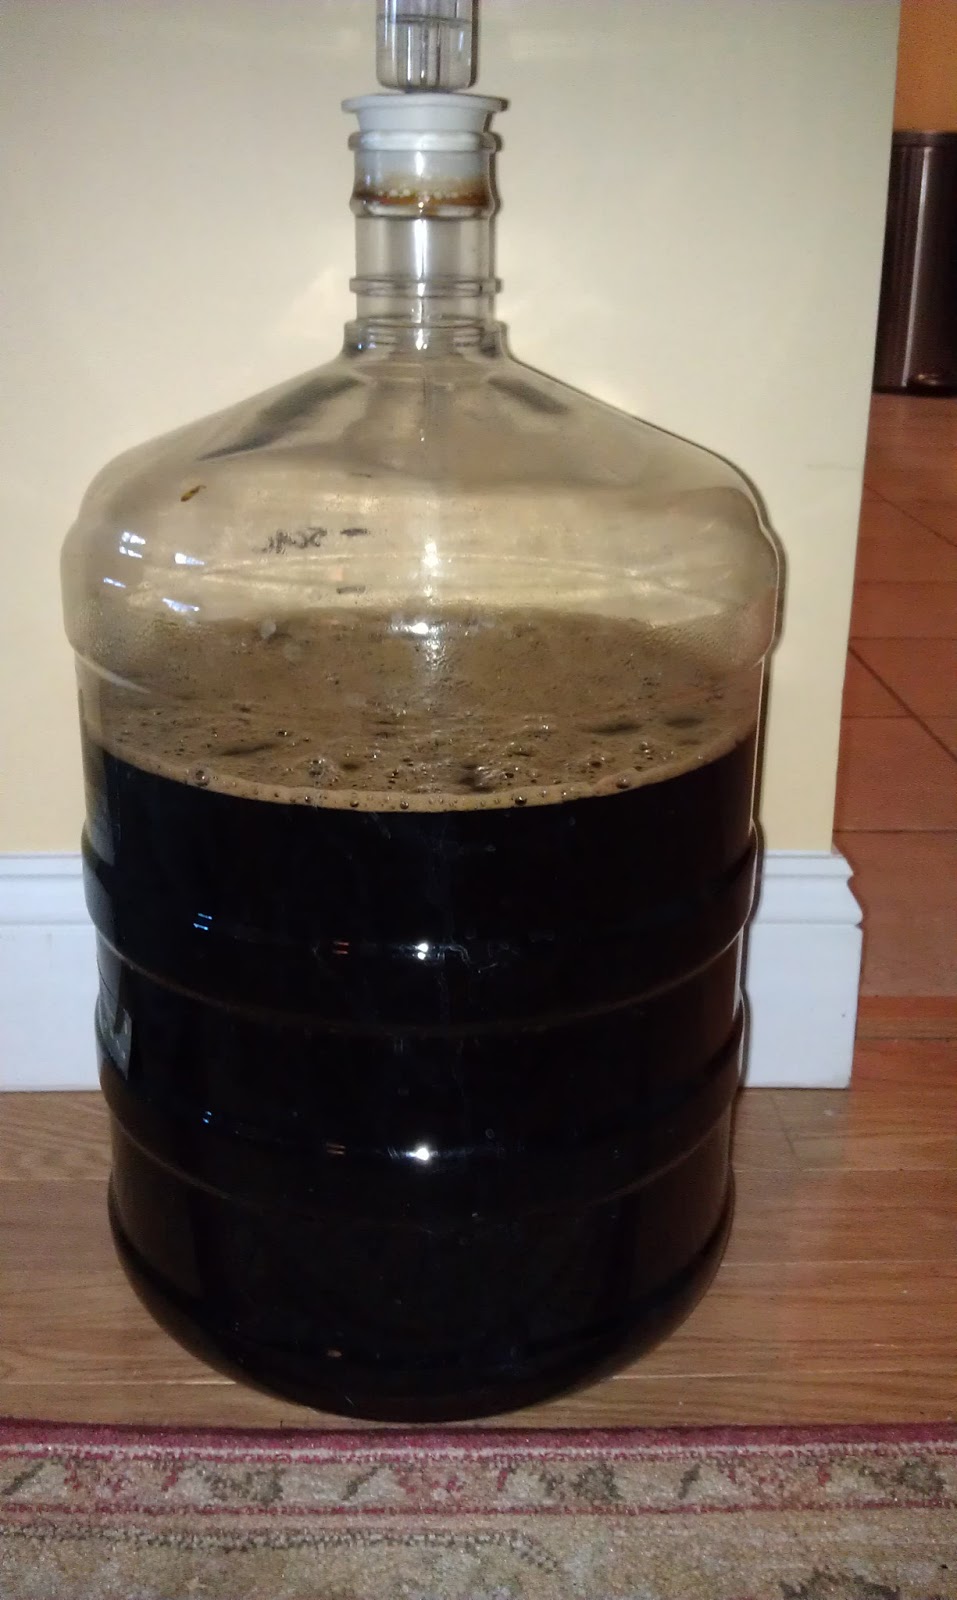
Here it is in the fermenter.  Notice that there is a TON of headroom, because I had to boil for 2 hours to get the gravity UP to 1.054.  I only collected 4.5 gals, and then I pitched my dry yeast.  I hope it tastes good, but we will see in a week or two.

Next up for tasting is the apricot saison. I may get another can of apricot and add that in as well.

Happy brewing!

Friday, December 30, 2011

I'm Back!

Happy New Year, everyone!

I finally found some time to brew, helped by the fact that I took off this last week of 2011.   It was a busy brewing week, and here are the (quick) highlights:

On Tuesday my friend Wayne came over with some honey from his bee hives to make some mead.  Wayne gave me honey previously, and I used it two beers, a honey porter, and a tripel.  This year's crop was apparently excellent (the sample I had was very good), so we made a dry mead.  The process was incredibly simple, and today (Friday) the airlock is bubbling along merrily, so fermentation is going well from what I can see.  I am looking forward to seeing how this turns out, as my previous attempt at a mead was a sweet mead, and came out quite well, but is a bit sweeter than I like it.

On Wednesday I brewed an IPA.  I used the Stone IPA clone recipe as a staring point, but changed some significant things:
  • I used English Maris Otter as the base malt instead of US 2-Row pale ale malt
  • I used Safale US05 as the yeast, rather than the WLP007 Dry English Ale yeast that Stone specified (still not their house yeast, I gather)
  • I swapped out an ounce of the Centennial aroma hop for an ounce of Citra.  The Citra smelled heavenly, and I think I'll dry hop with that as well.
Now  it is no longer the Stone IPA clone, and my son recommended that I name it after our dog, Shayna.  so it is now Shayna's All American IPA!

On Thursday I brewed an Oktoberfest / Maerzen.  The recipe is 46% Pilsner, 46% Munich, 8% CaraMunich, and it smells fantastic!  I am fermenting with natural refridgeration, so I hope that Mother Nature helps me out, and keeps the temperatures below 50 for January, and below 30 for February.  It is tough to count on that, as she is fickle this year, and it has been unseasonably warm!  In fact, my starter needed some additional time, so I let it go overnight, and then racked the beer onto the yeast cake this morning after I oxygenated it.  As of now (Friday evening), it looks like fermentation is starting, but it is not yet at high krausen. 

Last, today I picked up more malt (I feel like I am swimming in it) from the Malt of the Month club (see Valley Malt in Western MA), so I'll have to keep brewing or really be in trouble!  BTW, Valley Malt is a really cool local maltster, and I'm happy to support them since they are doing some interesting things locally.  The malts I have used have all been interesting. I used one of them in an American Amber ale in November, and I'm pleased with the results.

That's it for now. Hoppy New Year to all!

Wednesday, August 24, 2011

Belgian Blondes, and more....

It has been a while since I last posted, and thought I would catch up a little bit.  I have not been brewing too much this year, in fact I think I have only made three batches in 2011:
  • Honey Porter (using some local honey from my friend Wayne)
  • Wit (a summer favorite that didn't last the summer)
  • Belgian Blonde
The Blonde was quite an adventure in fermentation, as I brewed it on July 7th.  Since I live in Boston, summertime brewing is a risky thing, unless you have pretty good temperature control for your fermentation.  I really don't, nor do I have a conveniently cool basement (I live in an apartment), so I have to do without or brew Saisons.  Not that I don't like Saisons (I do), but I brewed them the past two summers, so I wanted something different.  I ended up with the Blond, as I have a fair amount of Pilsner malt, and not so much Maris Otter (pale ale malt), and the Blonde is a nice light style.

My original intent was to make a fermentation chamber out of rigid foam insulation, as was described in a BYO magazine article.  Finding the materials wasn't as easy as I hoped, and I bailed out on that for lack of time before my brew day.  Instead, I improvised a fermentation chamber with a large cardboard box, an air conditioner, and a temperature controller--and a sleeping bag.  It worked as well as I could have hoped, and the temp of the wort stayed on target through the fermentation, and there were no off flavors when I kegged the beer.  Hooray!

Next up, is an experiment with locally grown malt from Valley Malt, located in Western Massachusetts. I joined the Malt of the Month Club with another BFD member, and got my first shipment a while ago.  I now have 25 lbs of 2-row pale ale malt to work with, and I'm dying to try it out--but I'm waiting for the cooler weather first! Next post: the results!

Thursday, December 23, 2010

Happy Holidays!

Hola brewing brothers and sisters!

It is about a month since I brewed the three beers, so I thought I would post the outcomes.
  • Stone IPA clone: It has been in the keg for about two weeks and initially clogged the dip tube with hop particles.  After I cleaned out the tube, I've drunk several glasses, and the hop particles seem to be almost gone and it is clearing nicely.  The hop flavor is strong, as you would expect, and it is quite clean! I think this one is a winner.  Next time, I will dry hop using  a hop bag to reduce the particulates!
  • Patriot Oatmeal Stout (or Maple Ave Breakfast Stout, if you prefer): Also in the keg for a couple of weeks, but no dry hopping, so no clogged dip tube! Delish!  Just as good as the one I brewed for the competition, I'm looking forward to drinking this all winter.  The caramel, roast and malt flavors are balanced perfectly, and it is a treat!  I took some to my friend Andy's house when we watched the Bears/Packers game this week, and it was great!
  • Czech Pilsner: I just kegged this last week and stuck it in my fridge to lager for a while.  Even when I kegged it, it was brilliantly clear, having been hanging in an unheated porch for the past couple of weeks after the fermentation completed.  All the yeast seems to have dropped out (well, most of it) and the flavor was pretty nice, with just a hint of DMS.  I'm  looking forward to the completion of lagering so I can start drinking it in ernest--probably around the middle of January. YUM!
I'm thinking about my next beer, which will probably be a honey porter, since I still have a bunch of Wayne's honey left.  The Tripel I made with it turned out great--I wish I had kept more of it!

Happy holidays to all, and great beer to you!

David

Sunday, November 28, 2010

Three days of Brewing: Day 3, Czech Pilsner

I'm writing this on Sunday, and day 3 was Wednesday, so this will serve as sort of a wrap up.


Since Wednesday was the day before Thanksgiving, I had to take care of a couple things in the morning before I started brewing, but I did manage to mash in around noon.  The technical part of the mash and boil was pretty straightforward, and I hit my numbers until the end of the boil, when I discovered that I had more evaporation than expected, and my gravity was higher than expected after the 90 minute boil.

I had a couple of visitors on Wednesday as well: Bill Grinley and John Kalinowski--both brewers and BFD members.  Bill is an extract brewer who wanted to learn more about doing all grain, but he missed the start of the mash and arrived as I was in mid-vorlauf.   I enjoyed having the company and a chance to talk beer and brewing with them both, especially as it made the brew day go a bit faster.

My biggest concern on Wednesday was that my Oatmeal Stout was not really fermenting as expected.  In fact there was no airlock activity on Wednesday morning, and I put in another sachet of yeast to try to get things going. Nothing happened the rest of Wednesday, and I was away Thursday and Friday, but when I checked on it Saturday, it was bubbling away.    For that matter, the IPA had pretty much slowed down, and the Pilsner was bubbling along normally, holding about 54 degrees. Whew!  Everything is working, as far as I can tell.

Happy Thanksgiving, and happy brewing to all!  I will follow up with tasting notes on these three brews as they finish fermentation and are ready to taste.

Tuesday, November 23, 2010

Three days of Brewing: Day 2, Oatmeal Stout

Before I get into today's activity, I have a post-script on day 1. The airlock on the IPA started jumping around 1.5 hrs after I pitched the yeast (or the wort, since the yeast was already in the carboy), and within 4 hours it had overwhelmed the airlock with Kraeusen. Luckily I was there, as my son and I were having dinner, and I was able to insert a blow-off hose before any damage was done. It was pretty fun eating dinner and watching the Kraeusen fill the tube (photo at left) and move through it. We moved the bucket and fermenter to a location that was in the mid-50's to cool it down so the fermentation temp would be around 68.

This morning I could hear the bubbles coming out of the blow-off tube like a heart beat through the wall of my bedroom! The temp of the carboy was still quite high, despite the fairly low ambient temp. Wow!

On to today's brew. Anybody who knows me knows that I love Oatmeal Stout!  I won the Patriot Homebrew competition because it was one of the few beers that I brewed over and over to try to get it right.  So now it is a regular fixture in my fridge, and I need a new batch.  The recipe is published, but it still gets tweaked slightly every time I brew, and this time is no exception, as I subbed out Crystal 80 for Crystal 60, just slightly lighter, but otherwise not much different.  I got an earlier start today, so now, at 11:30ish, I am pretty far along in collecting my wort.  As it should be, Oatmeal Stout is dark, nearly opaque, and I'm getting excited about drinking it already!  Of the 3 beers I'm brewing this week, this will be ready to drink first, probably in a couple of weeks. Here's why:

The IPA will ferment in a short time (really short given the strength of the fermentation), but will need to sit and dry-hop (addition of hops after fermentation, to add aroma) for a couple of weeks.  The Pilsner is a lager, and will take 2-4 weeks to do the primary fermentation, then it needs to sit in the cold ("lager") for about 4 weeks to finish off and be ready to drink.  The stout should be done fermenting and ready to drink in about 2 weeks.  Nice!

Well, while I wasn't looking, I managed to collect about 8 gallons of wort in the boil kettle. I only needed 7, so now I'll have to boil for 90 minutes instead of 60 to get the right gravity. Still, not the end of the world, I think.

90 minutes later.... Well, the evaporation hasn't been as rapid as I thought, and my gravity is still low. I think.  It should be up around 16.4 Plato and it is now around 15.0 Plato. Not the end of the world, but it has me wondering if I correctly measured the evaporation yesterday--or if this much heavier wort is just evaporating more slowly because it isn't boiling as vigorously.  Hmmm.

Well, into the fermenter it went at 2:40pm, with a brand new bubbler-style airlock.  If it blows through the airlock I have another blow-off tube and it is next the bucket!

Tomorrow: Pilsner

Monday, November 22, 2010

Three days of Brewing: Day 1, IPA

It was tough waking up this morning. Days off without schedules are a rarity, but I dragged myself out of bed and got moving. I decided to try something new (to me) that other folks in BFD have recommended, which is to use "Malt Conditioning" (see http://braukaiser.com/wiki/index.php/Malt_Conditioning) to try to increase my efficiency.  That took a few minutes to do, but didn't really add any significant time to my brew day, which is nice.  I think it worked, as well, since I got about 80% efficiency in my mash--not bad!

I am sitting here now, several hours later, the boil has just ended, and I'm about to cool the wort down to pitching temp.  So far, everything has gone very smoothly.  Here's how the new setup looks:
From top left to bottom left:  hot liquor tank, new boil kettle, other pot for heating water for mashout.  Toolbox with pump mounted inside, and mash/lauter tun (Rubbermade cooler). 
The design of everything has worked as planned.  In brewing, people dream about having brew sculptures they can use to brew.  People build these sculptures out of metal tubing, or buy ready made ones, often for thousands of dollars.  In truth, they are useful, but you can't use them in a kitchen--and that's where I brew!  My brew sculpture was made by Maytag!  I have no problem making five gallon batches with this setup, and my back is happy about the pump, since I don't have to lift heavy containers of hot (or cold) liquid!  


OK, so about this IPA.  You can sample what I'm aiming for if you go to many liquor stores in the US. Stone IPA is pretty widely available, and is a great example of an American IPA.It should have about 7% alcohol by volume, which is a little higher than your typical macro-brew.  Very hoppy (65 IBUs), light in color, and aromatic from dry hopping, it is a very drinkable beer--if you like IPAs.    I like IPAs!  A lot!  Lately I haven't had enough of them, I think, so this should help.  Here's what it looks like in the pot, cooling:
Copper chiller in the wort.  All the little flecks in the wort are hops or hot break materials (protein).  Those will be left behind in the pot.

And now, in the fermenter:

The recipe was published recently in Brew Your Own magazine, so I decided to give it a shot. Aside from the evaporation rate on my boil being a little high, the only concern I have is that the 2oz of Centennial hops I added with 15 minutes to go are adequately utilized and give a nice piney aroma.  I use a "hop bag" in my boil because I don't have a filter on the bottom of my pot that won't clog if I use pellet hops, which are the most commonly available (they look like rabbit chow).  Pellets are great, but I think I need to make some modifications in my system, specifically doing a whirlpool and adding a counter-flow chiller to let the hops out of the bag.  In time, I'm sure I'll get there.  In the meantime, I'll hope for the best. Or hop for the best!

Tomorrow I'm brewing an Oatmeal Stout--the one I won the competition with. I need to toast some oats today so I will be ready tomorrow for the big brew.  I will also gather my other grains for mashing, so in the morning I can just start crushing and brew sooner. 

Sunday, November 21, 2010

Back to Brewing - November 2010

Whew! It has been a while since I posted, and while I have been active in the beer world, I haven't done a lot of brewing since May or so.  A lot of time has been taken up with work, sure, but it also has just been too HOT in Boston to consider brewing much over the summer.  I also was the organizer of the New England Regional Homebrew Competition (NERHBC) which took place on October 23rd, and that took up a lot of my time over the fall--and is a topic for another post!

But now, I'm back!  I just got a shiny new 38qt (9.5 gal) stainless steel brew pot, which, with the help of my friend John Kalinowski, I outfitted with a 1/2" ball valve and a Blichman Brewmometer.   Cool!  This is replacing a 30 qt (7.5 gal) aluminum turkey fryer pot which I was using as a boil kettle. It will be reuses as a hot liquor tank, however, and will retire my bottling bucket from that job!  The net result, I hope, will be a more streamlined brewing operation, less lifting (keep my back intact) and, well, more beer!

The coolest thing about the new kettle is that it will fit over 2 burners on my gas stove.  That means faster heating, and (hopefully) a better boil.  I tested it out today and it heated 8 gals of water at about 1.75 degree every minute--since I'll probably be boiling about 7gals of wort, and that is a bit heavier, I'll still be happy with 2 degrees per minute.

I had forgotten that it is a bit of a challenge to get ready to use a new pot.  From the time I got it (and yes, I could have ordered it pre-drilled) here's what I've been doing:
  • Measuring out where to put the valve and the thermometer. Both are centered midway between the handles, and the valve is about as close to the bottom of the kettle as I could go without being on the curve. The instructions that came with the Bremometer said to put it a minimum of 6" above the bottom of the pot, but when I measured that, I decided it might just be at the top of the wort--not a good thing.  So I went for 5.25" which is around 5 gallons, as I found out today.
  • Drilling it out.  John came over with his step bit, which is essential, and we drilled out in no time.  The great thing about a step bit is that it doesn't create a lot of burrs that would cut the gaskets for the valve or thermometer, which aren't welded on.  We still sanded it out though to make sure.
  • Leak testing: Once we screwed the valve and thermometer in, I had to make sure they didn't leak.  That was surprisingly easy.  I had one small drip near the valve, but that was easily fixed. I hardly tightened much more than hand tight, either!
  • Calibrating measuring stick: It may seem odd, but the pot was not marked anywhere to show how much is in it.  I have another pot that has markings by quart, so I can tell how much liquid I have, but this new pot has none.  So, I took my big mash paddle and added 1/2 gallon at a time, marking the paddle for each 1/2 gallon up to 8 gallons (much more than that and I'll have a boil over for sure!  That took about 30 minutes, but it will make it easy for me to tell how much wort I collect and what is left after boiling.  A little work on this now will save a lot of uncertainty later.  The pot I had been using was marked on the outside, but that didn't tell me as much, so this time I am starting clean.
  • Cleaning:  The last step, and one of the most important is to make sure there aren't any leftover oils from manufacturing or any other dirt that had appeared in storage, shipping or my own set up.  So I took my 8 gallons of water and added 8 tbsp of PBW, heated to 140 and let it sit for a while.  When that was done, I dumped the PBW solution into my old brewpot to make sure it was clean.  A good thing, too!  There was a layer of stuff that came off, and now my hot liquor tank (it holds hot water) will be good to go tomorrow as well.

Here's what the new pot looks like now:


Tomorrow: Brewing for the first time in the new pot! I am taking time off from work this week to get some brewing in, as I have not done as much as I would like. Here's the lineup (remember, it is Thanksgiving week, so I'll be busy Thursday and Friday with family stuff):
  1. Monday: Stone IPA clone
  2. Tuesday: Patriot Oatmeal Stout
  3. Wednesday: Czech Pilsner
More posts to follow on the next 3 days...

Tuesday, May 4, 2010

Brew HaHa - shown on TV

Schedule for "Brew Ha Ha"

  • 6:00pm Sat, May 8 | 10 - if you live in Cambridge 
  • Online, click to view  - I hope you enjoy it! I had a blast working with the group that made it.

Friday, March 26, 2010

Starting to brew - some tips

Every so often someone asks me how they can get started brewing.  It's a great question, and since everyone who brews is a new brewer once everyone has a story.  Here are my suggestions on what to do if you want to start brewing:
  •  Watch a video on homebrewing to see if it looks like something you want to do. Here's a good example:
  • Try brewing with someone else.  If you don't know a brewer, look for a club in your area (see http://www.homebrewersassociation.org/pages/directories/find-a-club) on the Homebrewers Association website, or google Homebrew clubs in your area.  Or ask at a local homebrew shop if you have one.  When you contact a club, just tell them you want to learn how to brew and you are experimenting. Brewers are friendly people and I'm sure they will hook you up with someone who is brewing quickly!
  • Read a book about brewing.  From my experience, John Palmer's How to Brew is the best one going. He has lots of detailed tutorial information for your first batch, and a really useful amount of information on the science of brewing that you will be interested in later.  I still refer to this book for information on a regular basis.
  • Get a kit for your first batch--but make sure it is fresh! Note that there are both equipment kits and recipe kits--you will need both unless they are selling a combo for beginners.  Kits are usually graded for level of difficulty, so make sure you pick one that is "beginner" for your fist batch.  There are some good options online at Beer, Beer, and More Beer, Northern Brewer, or William's Brewing--or go to your local home brew shop.    Fresh ingredients are key, don't let them sell you the dusty old kit that's been on the shelf for months--get one that is new and has fresh ingredients or don't buy anything!
I would be remiss if I didn't mention sanitation.  One of the worst things that can happen to your beer is an "infection".  You can prevent this by (a) cleaning thoroughly using something like PBW or B-Brite; and (b) sanitizing everything the beer touches post boil with Iodaphor or StarSan.  Why do I say "post boil"?  Well, the boil sanitizes everything in it.  After the boil, however, you will be putting the chilled wort into a fermenter using a racking cane, tubing, etc., all of which need to be germ free or you risk infection.   A little extra effort will protect your beer!

In the end, brewing is supposed to be fun, so don't take it too seriously, especially the first time out.  As Charlie Papazian says "Relax, have a homebrew!"  You are making beer, after all, not doing brain surgery.

Good luck, and let me know how it goes!

Monday, March 15, 2010

Brew HaHa

I have not posted in a while, and I have had a number of different posting ideas floating around in my head, but have not managed to write about any of them.  nevertheless, I need to bog about this one!

Brew HaHa is a documentary made by a group at Cambridge Cable TV.  I was filmed for the documentary--making the Roggenbier actually-- and my footage made it in.  Actually a certain amount of the brewing process shots (grinding grain, weighing hops, the different grains) were shot at my apartment, as well as some interview footage and actual brewing activity.  It was really interesting to watch the film, which premiered last night at Cambridge Cable TV.

The story of the documentary is covered in the linked article, and I recommend watching it on CCTV (http://www.cctvcambridge.org) though I couldn't tell you when it will be on-- they have a program guide for that.  It was an interesting experience, and I met some new and enjoyable people as a result--fellow brewers and beer appreciators both.

Anyway, when you find a time to watch the documentary, I recommend that you enjoy it with a beer in hand!  I'll be interested in any feedback that you post.  Enjoy!

Wednesday, December 23, 2009

"Roggenbier! Gesundheit!" or "Adventures in Yeast, part 2"

My most recent brew was a Roggenbier, which is a German style of rye beer.  It is supposed to be formulated very much like a Dunkelweizen (dark wheat beer) but with rye instead of wheat. I've actually never had an authentic Roggenbier, so I'm not entirely sure what to expect, but we'll see.

The brew day was also complicated by the fact that a group of documentary film makers from Cambridge Cable TV (CCTV) was here filming my every move.  Despite, or maybe because, of that, things went smoothly brewing the beer, from grinding to mashing, to lautering, to boiling, to cooling and then to pitching.

The joker in the pack was that I planned to used the left over yeast from a Hefeweizen I brewed back in June. I put it in a sanitized container in the fridge, and pitched it at the appropriate time. Luckily, I also had a spare, new, vial of WLP300 (the same yeast) just in case!


Well, "just in case" turned out to be necessary, because 24 hrs after pitching, there was NO activity in the airlock.  So, I dumped in my vial of yeast, and within a few hours it was off to the races. And then a very strange thing appeared in my carboy on day 4(see photo).  It was kind of slimy looking, and not what you would normally see for krausen, but, my club assured me that it was OK.

I checked the gravity, and it was at 1.029, and was syrupy and sweet when I tasted it. Definitely not infected!  So I keep the heat on, and let it continue.  Yesterday, after all airlock activity stopped, and it sat for a bit, I checked the gravity again, and found it was 1.026. Strange, after several more days of fermentation at 66 degrees, I expected it to drop further.  When tasting it, it was clear that it had attenuated more, as the sweetness was gone, and it was no longer syrupy in texture.  I wonder if my hydrometer is off! It actually tasted like the beer is done fermenting-a little hop presence and very slight rye bite.  But as I said earlier, I've never had a real Roggenbier, so it is hard to tell.

I am going to keg what I have and see how it goes.  The beer will debut publicly at the documentary premiere, tentatively Wednesday 2/24/2010, 7-9 PM in Cambridge. More on that when it gets closer.

Tuesday, December 1, 2009

Brewing Oatmeal Stout-one year later

This Sunday I stayed in on a beautiful fall day and brewed Oatmeal Stout.  This one is not destined for the Sam Adams Patriot Homebrew competition, since I'm pretty sure they wouldn't let me win twice in a row with the same beer!

I set out to duplicate the award winning recipe, but ended up changing it a bit because I ran out of two of the ingredients--that's what you get for not planning ahead!  I didn't have all the the Black Patent malt that the recipe calls for, so I made up the difference with Carafa II, which has a slightly different flavor, but we're talking about less than 1% of the grain bill, so it probably won't be noticeable. I also ws out of Dextrine Malt, so I substituted Wheat Malt since the dextrine was for head retention anyway.  Again this is a small amount, about 1.3% of the grain bill.  It shouldn't end up tremendously different from the original, but it will be interesting to taste.

The third change was less dramatic (I hope), which is that I replaced the liquid yeast in the original (White Labs WLP001) with dry yeast (Safale S05), which is essentially the same yeast.  The lag time was a bit more than I would have anticipated, but it started up OK and is fermenting strong as I write!

One of the funny things about winning the competition is that people ask me all the time if Sam Adams can't "steal" my recipe.  First, they paid me a royalty for it, so it wouldn't be stealing if they used it in a more widely distributed beer.  Second, I published the recipe in BYO magazine, so it is in the public domain now.  Third, all they would really have to do is tweak it slightly to get essentially the same flavors but with a different grain bill and it would be a different recipe.  Not that I expect them to do that, since they are honorable people, but that's all it would take.  Heck, I tweak it myself, every time I brew to attempt something different or just because I ran out of some ingredient or other.

Brewing for me is about creativity.  I have a great time trying new things and tasting the result. If I like it, then I'm happy, if I don't then I'll try again (and find someone who does like to to give the first batch to).  That's how I got rid of the first batch of Oatmeal Stout that I made--my brother in law loved it!  I hope this batch is good, but there's always another one in the queue. More on it when it comes out.

Tuesday, November 24, 2009

Make way for yeast!

I wanted to share my recent brewing activities, which I think are pretty interesting.  Eight or nine weeks ago I decided to brew an English Southern Brown Ale, which I brewed once before, a couple years ago, and greatly enjoyed. It is an unusual style, having almost died out in the UK.  Most of us are familiar with the Newcastle Brown or Sam Smith's Nut Brown, both of which are Northern Brown Ale--dryer and less hoppy.  Northern Brown is strongly influenced by the brewing water of Newcastle upon Tyne, which is quite hard, and imparts a very distinctive character to that style.  The Southern English was brewed in London, which had softer water, and is a sweeter style of brown ale, and lacking the hard water's influence.  I think the Southern Brown is a very nice beer, though I like both styles--I was really attracted to it because I can't go to the store and buy it anywhere.  That's a major point of home brewing to me, that I can brew beer which can't be found in the store anywhere--how cool is that????

Anyway, I pulled out Jamil Zainacheff's recipe for the Brown and planned my brewing day.  One of the key factors in a beer like this is the yeast, and I picked up a vial of White Labs WLP002 English Ale yeast and made a starter to get the yeast going.  The brew day went very well and I hit all my planned gravity numbers, pitched the yeast and everything was good!  Very good, as I won a First at the NERHBC with it!

One key question (as always, when a brew is done) was what to brew next.  Since I had a big yeast cake with WLP002, I decided to do a British Best Bitter, another favorite of mine, that does best on that same yeast.

Again, the brew day went well.  The big question, however, was how to rack (transfer) the Brown to a keg, while cooling the Bitter, so that the carboy (the fermenter, a big 6.5 gal glass jug) was not empty for long before I could add the Bitter wort to it.   So, I  set up my siphon and started transferring the Brown, but forgot how much ale I had (nearly 6 gals), and was taken by surprise when I heard the sound of splashing.  Yup, the keg overflowed, and I had Brown ale all over the floor. It was a sticky mess!

I stopped the flow of the siphon,  grabbed some bottles, and began bottling the overflow.  When that ran out, I had to bottle some of the contents of the keg to get the level down sufficiently to avoid backflow into the CO2 if it ran out. There's not much that's worse than beer in your CO2 tank!  Although beer all over the floor counts, too--and I had plenty of that!  In the end, I got it done and bottled 7 bottles of Brown ale and got the Bitter fermenting VERY quickly, virtually no lag time at all. Cleanup, however, took some time.

A few days later, the fermentation was done and the yeast flocculated (a great word, meaning "clumped and dropped to the bottom" so there was a nice clear beer, with just the right level of alcohol and no off flavors! So I set to work planning my next brew.  Bear in mind that I had been feeding and caring for the same yeast through two relatively low alcohol beers, and they were strong and healthy and ready to keep growing.

High alcohol beer (over about 7%) requires a good amount of yeast to start, particularly because as the alcohol level increases the yeast start dying  off because too much alcohol will kill them.  So if you have a lot of yeast to start, you can spare a few.  My fellow BFDer, Mike Robinson published his English Style Barleywine recipe to the group, and it looked like a winner to me (Mike has more ribbons for his brewing than pretty much anyone I know--they cover both sides of a 10 foot rafter in his basement, and there are probably more--he's good!).  So I got all my ingredients for the Barley Wine, including another yeast--this one a dry yeast with higher attenuation (it keeps working longer in a higher alcohol concentration) to work with the original WLP002.

Armed with all that, I started brewing the Barleywine on a Monday morning....

Things went generally well, but I did not get the starting gravity quite as high as I was expecting.  However, I racked it onto the existing yeast, oxygenated, added the second yeast, mixed well and put in the airlock.  Within 30 minutes I had bubbles of CO2 coming out of the airlock, so it took off pretty well.  I was very pleased until the next morning I discovered that I had YEAST coming out of the airlock!  The fermentation was extremely strong, so I had to pull the airlock and put in a "blow-off" tube, which is another type of airlock that uses a bucket of sanitizer as the airlock.

So the experiment worked.  One vial of yeast produced three beers, one of which already won an award!  I'll be bottling the barleywine soon, and maybe it will win something-- but even if it doesn't I'll have a great beer to enjoy for some years to come!

Thursday, September 3, 2009

Brewing a Saison


Last Saturday I brewed a Saison, which is a nice, refreshing summer beer. I started thinking about this in early August, when summer finally arrived in Boston this year, and it was HOT!!! Ironically, it has gotten much cooler here, starting the day I brewed. Oh well.

I followed Jamil's recipe for the Saison, pretty faithfully. The biggest change was that I replaced 1.4 oz of one malt with a slight lighter version of the same malt. In a grain bill of about 12lbs, it shouldn't make much difference.

Anyway, it was a really interesting brew session because I was using a lower than normal mash temperature, and per Jamil, mashed for 90 minutes rather than the usual 60 to make sure I extracted all the fermentable sugars. I guess I did it right because I hit the appropriate gravity in the fermenter when all was said and done, and there was a fairly short lag before fermentation really kicked off. I used a Saison blend yeast, rather than a straight Saison yeast--so White Labs says it will ferment more completely than the standard Saison yeast.

Right now (Thursday afternoon, 5 days later) it is still fermenting away, with the airlock bubbling out about every 7 seconds. That's a pretty long fermentation, but it bodes well with regard to hitting the appropriate FG. If it doesn't hit, then I would have to pitch some Champaign yeast to dry it out the rest of the way. I think I'll know in a few days when it slows down significantly and I check the gravity (that's the amount of sugar left).

More on this as it develops. In the meantime, bottoms up!

Note, if you want to try a Saison, look for Saison DuPont, which is fantastic. If you can't find that, there are some other commercial examples that are quite good, but that's my favorite.